How to Create Your First Mailchimp Newsletter
MailChimp is a popular marketing platform that helps millions of businsses create email marketing campaigns, no graphic design or technical skills required.
If you've invested the time in creating quality content for your business's website, it's critical to ensure that your customers have access to that content. Email newsletters are a great way to regularly connect with your users without seeming intrusive, by delivering your content in an easy-to-digest format that your users will hopefully find valuable or interesting.
In this article, we will show you how easy it is to use MailChimp to send out your first email newsletter.
1. Brainstorm a theme for your MailChimp newsletter
Before you begin creating a MailChimp newsletter, you need to first decide what kind of content you want to promote in your newsletter.
If your business has a blog, you might want to include the latest article(s) you published there, or highlight the most popular ones. You can also use the newsletter as a way to communicate business-critical information to your users (e.g. your business recently changed its hours, or you recently started offering a new service).
If you're looking for more content to include in your newsletter, you can even look up a national holiday related to your field/profession, and use that as a launching pad for your newsletter theme. For example, if you are a dental practice, you might want to schedule a newsletter to go out on National Toothache Day, February 9, to remind your patients to schedule their next cleaning appointment.
2. Create a MailChimp campaign
If you don't have a MailChimp account yet, sign up for one now (all you need to do is provide an email address and create a password). Log in, click on "Campaigns" in the main menu, and click on Create Campaign. Make sure to pick a campaign name that you'll remember -- note that the campaign name won't be visible to anyone who receives the email; it is purely for your organizational purposes.

3. Select or import your contacts
Next, you'll be prompted for your list of emali subscribers. If you don't have this available yet, you can skip it for now and schedule the campaign to go out after you've created a more robust contact list.
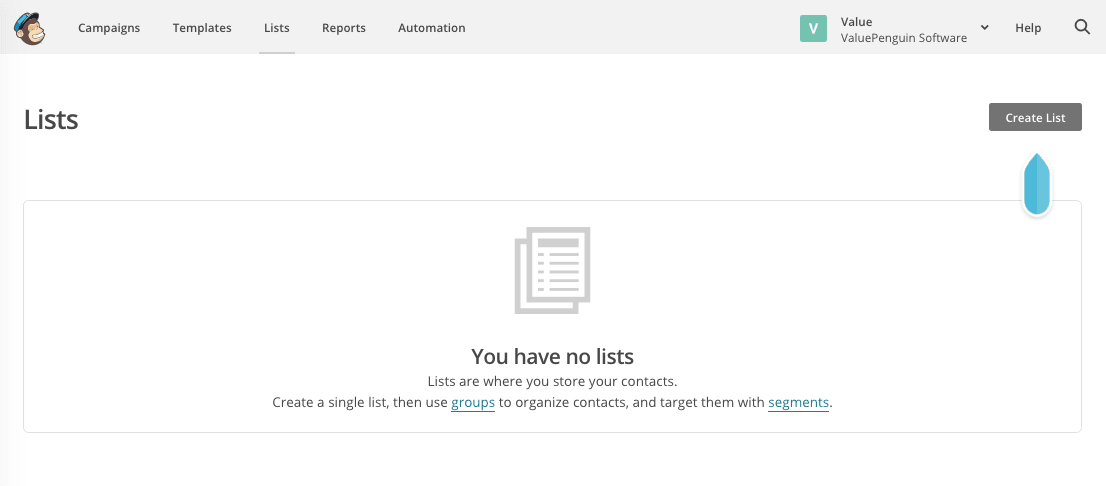
To create a contact list, or to learn how to create a signup form to get people to subscribe to your newsletter, click on "Lists" in the top menu bar. You'll see a screen like the one shown below.
If you already have a list of email addresses from your existing users/patients, you can import it into MailChimp from a text file, Excel spreadsheet, or from other places like Google Contacts, Salesforce, or Zendesk.
4. Fill out your MailChimp campaign info
Now that we have determined where to send our email, we'll need to tell MailChimp some basic info about our campaign, including the email subject line, and the "from" name and email address fields (don't worry, you will still be able to edit this later if you change your mind).

You will also have the option to specify what information you want to track, and whether or not you'd like to automatically tweet the newsletter upon sending it out (by connecting your Twitter account).
5. Choose a MailChimp email template
MailChimp offers two main types of pre-designed templates: layouts and themes. Layouts are more centered around the actual structure of the email (how many columns and rows of text, and how many images). Some layouts are specifically designed to address real-life business purposes, such as making an announcement or following up with a user (for example, someone who added something to his/her shopping cart but never completed the purchase).

Themes are less customizable, but easier to get started with, since they give you more of a sense of how the final newsletter will look. Themes already include images and sample text to address a number of scenarios, ranging from holiday wishes to ecommerce promotions.
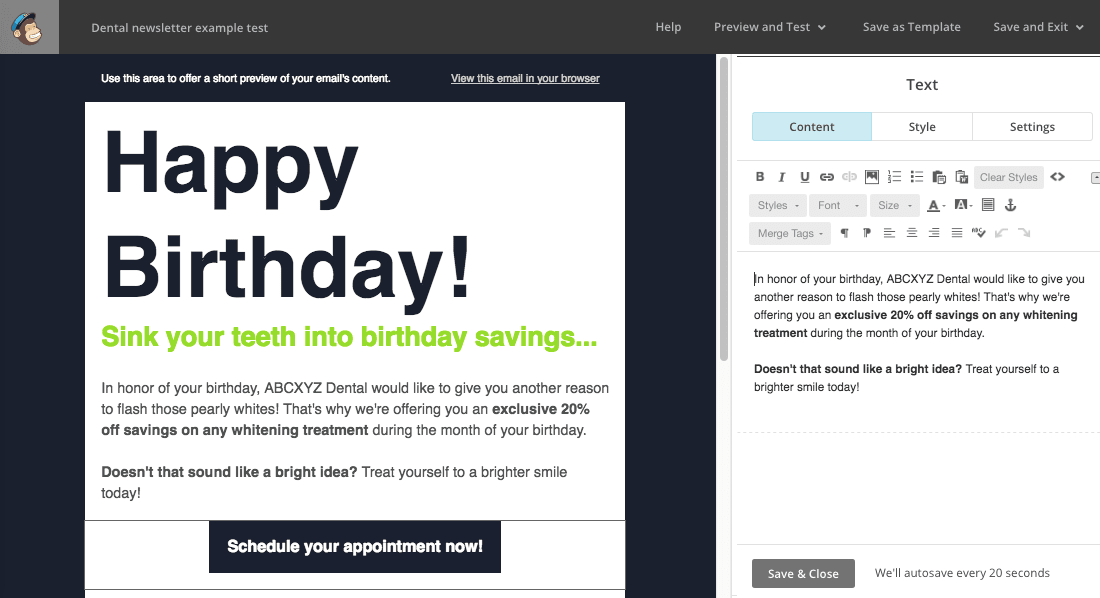
In our example, we will select the Happy Birthday theme, because we'd like to offer our patients a special deal: 20% off teeth whitening during the month of their birthday.

6. Customize the content of your MailChimp newsletter
MailChimp's Happy Birthday theme includes some example copy to get us started -- however, we should probably customize it our own writing style. Since we're including a promotional offer, we'd like to make sure that the offer is prominently featured in bold text, so that the reader has less chance of missing it.
Once we've customized the text with our specific offer, we can schedule it to go out as is -- but we could also make the extra effort to customize the images.
Keep in mind that because millions of businesses use MailChimp, it's possible that your subscribers will have already seen the same newsletter theme/design somewhere else. Therefore, we recommend customizing not only the text, but also the images.
7. Upload custom images to your MailChimp newsletter
When it comes to images, you have two main choices: (1) take your own photos, or (2) download photos from a website that offers free photography for commercial use. We recommend the second option, because there is such a low barrier to entry that you can get started as quickly as possible.
A simple Google search for "free stock photos" yields many sources of free stock photography, including sites like Unsplash and StockSnap. Whatever website you use, make sure to confirm that the license allows you to use all photos for free, even for commercial purposes, before downloading and using it for your newsletter.
For example, a simple search for "dental" on StockSnap yields a few results that we could download and file away for use in future dental-themed newsletters.

To continue working on our promotional birthday-themed email example, we downloaded a birthday-related stock photo from Unsplash, and uploaded it to our MailChimp account's image library.

Select the image you want to include in your newsletter, and click on "include." In this example, MailChimp detected that the image we uploaded was too large for most email inboxes. It helpfully suggests that we should reduce the image size so that it falls somewhere between 600 and 800 pixels.

The good news is that we can conveniently resize (and take care of other light image editing tasks such as adjusting the brightness/contrast, or cropping the image) directly in MailChimp.

Let's resize the image to 700 pixels, as suggested, and save our changes.
8. Double check everything before sending
Now that we've customized both the text and the images, we're ready to proceed to the next step: checking that all elements of the newsletter are complete before scheduling its delivery.
MailChimp helpfully presents an overview of important info about our campaign, including the subject line, which subscriber list will receive the email, what type of analytics we want to track, and more.
In our case, MailChimp informed us that we forgot to update the placeholder text with a preview that describes the purpose of our email. To address this issue, we should either delete the placeholder text or update it with the correct preview text.

We chose to update the preview text to read: "Exclusive birthday savings from ABCXYZ Dental!" This provides a sneak peek of the purpose of our email: to offer patients exclusive savings for their birthday.
9. Schedule your MailChimp campaign
MailChimp has compiled a lot of useful research about effective subject lines, as well as what time of day is historically tied to better success for email campaigns among their customers. You should consult this research, combined with what you personally know about your users, to decide when you think is the best time to send out your newsletter.

Once you schedule your newsletter, it will be sent out to your list of subscribers. Here's what our final newsletter looks like:

10. Sit back and watch the numbers!
Congratulations -- you've just built, customized, and scheduled your first email newsletter! Soon, you'll be able to analyze how the email campaign performed right from a dashboard in MailChimp, featuring your subscribers' open rates and click rates, and more details about their engagement with your newsletter.

You can use this data to continually tweak your future email campaigns with different types of promotions, designs, and content. Eventually, you'll be able to target more specific segments of your subscribers to ensure that every campaign is as successful as possible.